AIR OR COIL SHOCK?
Croissants or donuts? Death metal or Hip Hop? Flat or clipless pedals? Whether it’s food, music or bikes there are always options, and when it comes to mountain bike suspension you’ve got two choices: air or coil. The 4060 frame can work with either so you get to choose how you stay sprung.
Okay, air or coil, which do I choose?
Both have their advantages so choosing which shock to bolt to your bike will come down to personal preference and how you like your suspension to feel. Let’s start with air.
Air shocks are naturally progressive, which means as they compress they become firmer. That’s especially useful if you love jumps and berms as it can help you load the bike in transitions.
Air shocks are also super-easy to set up. With not much more than a shock pump and some volume spacers you can change how the bike feels and tune it to taste. That versatility also means you can get a setup that feels right for your home trails but that can be easily adjusted for when you go and hit the bike park.
Air shocks are lighter than coil equivalents – after all air doesn’t weigh much!
So, why choose a coil shock?
If you like a super-sensitive feel to your suspension, a plush ride, and the feeling of the bike hugging the ground, a coil shock will suit you best.
As they do not need to keep high-pressure air contained inside them coil shocks have far fewer seals. This means less friction, which in turn means improved suspension response. The result? A smooth and supple feel on the trail.
With fewer seals to worry about they are also more durable. So, if you’re a bike wrecker or particularly hard rider, a coil shock will require less maintenance.
Want to know more? Take a look at our Suspension According to SCOR feature: https://www.scor-mtb.com/suspension-according-to-scor
My 4060 came with an air shock, can I run a coil shock instead?
Absolutely. The SCOR 4060 is designed to work with either an air or coil shock, giving you the choice as to how you want to stay sprung.
Which shocks will fit my 4060 frame?
Most current shocks will fit but there are a few exceptions.
|
Brand |
Model |
Spring |
Compatibility |
|
CaneCreek |
Kitsuma Air |
Air |
No |
|
CaneCreek |
Kisuma Coil |
Coil |
Yes |
|
EXT |
e-Storia |
Coil |
Yes |
|
EXT |
Storia Lok V3 |
Coil |
Yes |
|
Formula |
Mod |
Coil |
Yes |
|
Fox |
Float X2 |
Air |
Yes |
|
Fox |
Float X |
Air |
Yes |
|
Fox |
DPX2 |
Air |
Yes |
|
Fox |
DHX2 |
Coil |
Yes |
|
Öhlins |
TX22 Coil |
Coil |
Yes |
|
Öhlins |
TX22 Air |
Air |
No |
|
Push |
ElevenSix Low |
Coil |
Yes |
|
RockShox |
SuperDeluxe |
Air |
Yes |
|
RockShox |
SuperDeluxe Coil |
Coil |
Yes |
|
RockShox |
SuperDeluxe Flight Attendant |
Air |
Yes |
Thinking about buying a shock not listed above? Please check clearances!
What size shock do I need?
Here are the juicy numbers you’ll want when ordering a new air or coil shock.
• Eye-to-eye: 205mm, trunnion mount
• Stroke: 62.5mm (for the LT setting 2022), 65mm (for the LT
setting 2023), 57.5mm (for the ST setting)
•
Bushings: SCOR trunnion mount frame bushings (spare part no. 30001741)
• Bolts: SCOR rear shock bolt set (spare part no.
30001740)
• Hardware, lower eyelet:
30x8mm
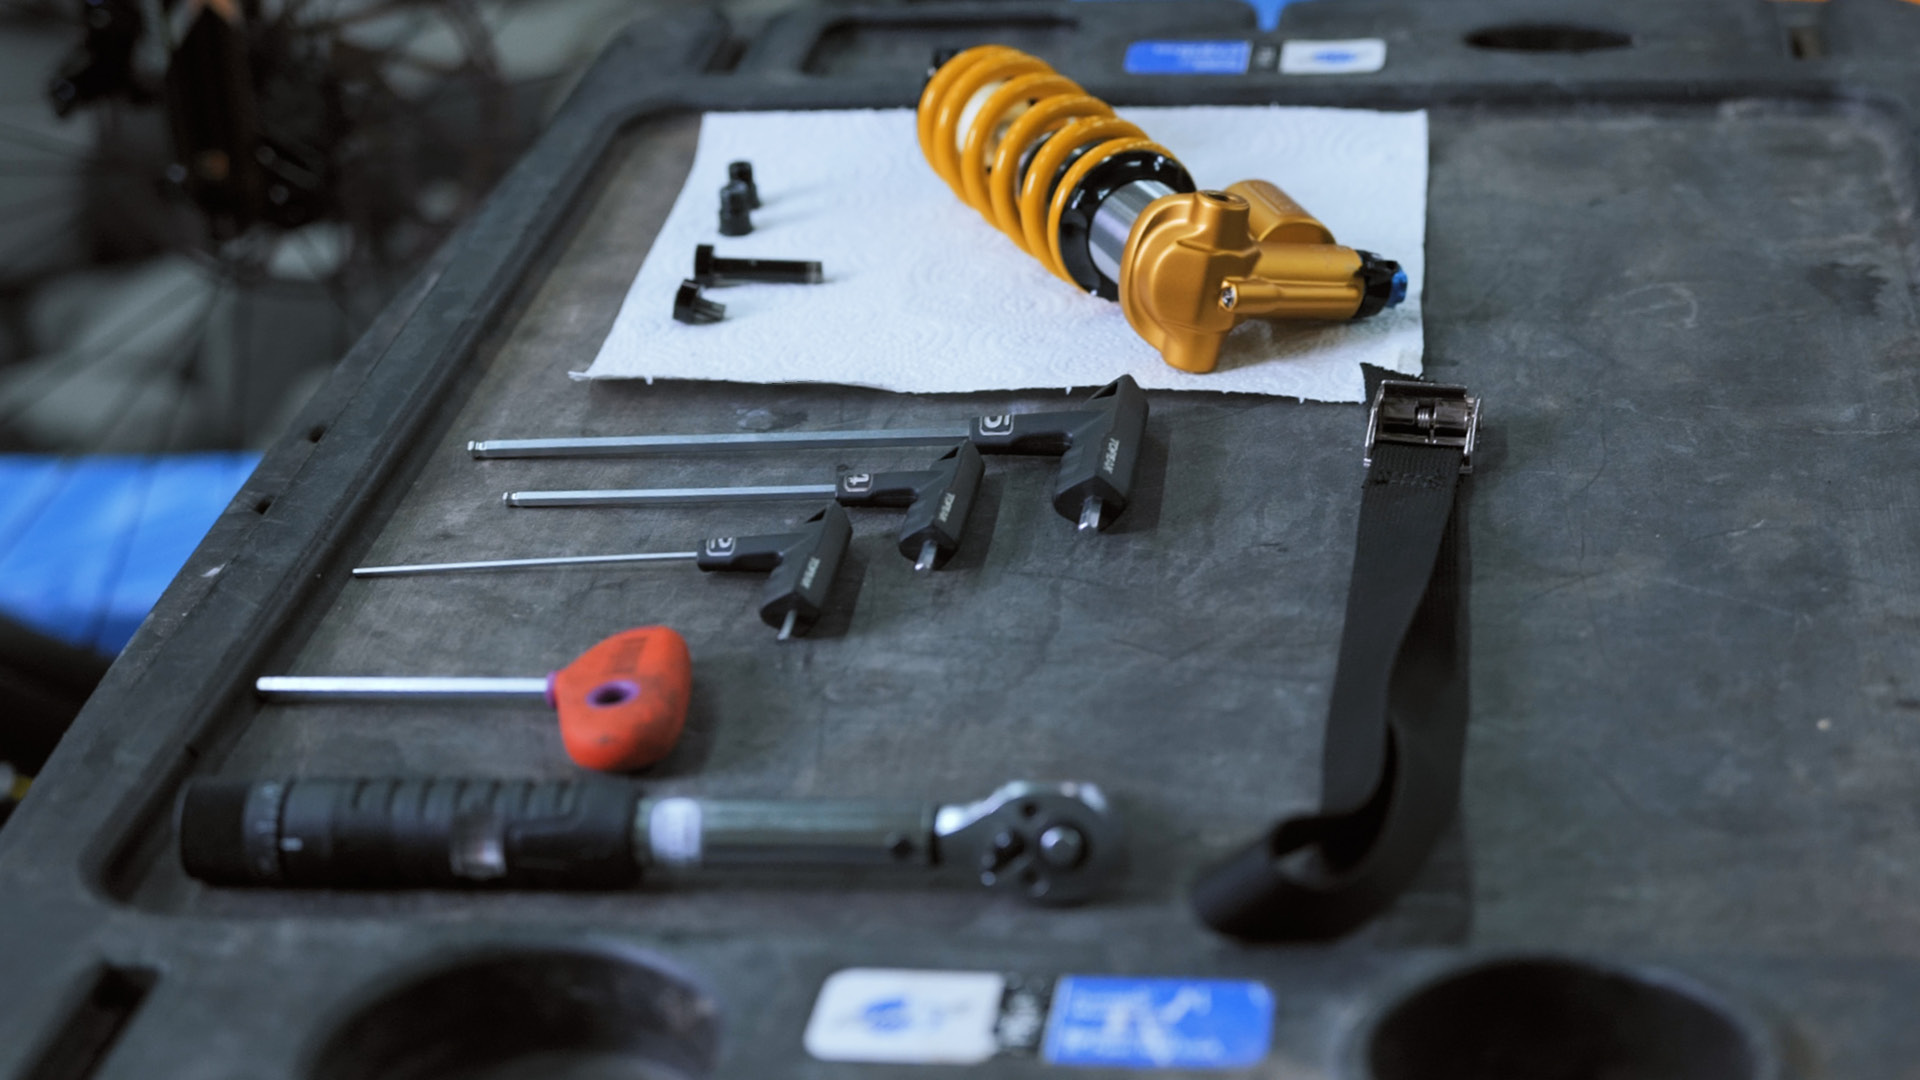
What do I need to swap shocks?
Exchanging your shock is simple! Just make sure you get the following sorted.
• Your replacement shock with correct hardware
fitted
• Torque wrench with 5mm hex bits
(8Nm)
• PTFE grease
• Threadlock compound
How do I swap shocks?
1. Place the bike securely in a work-stand ensuring you have
enough space to work around the bike.
2. Shift
the chain to the smallest cog on the cassette.
3. Push the lower cage of the rear mech forward to take tension
out of the chain. Use the Cage Lock button on the SRAM rear mech to lock the cage in
place.
4. Undo the rear axle using a wrench and
5mm hex bit.
5. Remove the rear
wheel.
6. Use a wrench and a 5mm hex bit to
remove the bolt that runs through the flip-chip.
7. Supporting the subframe in one hand, remove the lower shock
mount.
8. Use a wrench with a 5mm hex bit to
remove the upper shock mount bolts.
9. Remove
the shock.
10. Apply a light layer of grease to
the upper shock mount bolts and install the new shock.
11. Tighten the upper shock bolts to 8Nm using a torque
wrench.
12. Lightly grease the lower shock
mount and reinstall it through the shock and flip-chip.
13. Tighten to 8Nm.
14. Lightly grease the rear axle.
15. Insert the wheel into the frame and slide the axle through
the frame and wheel, ensuring the chain is correctly routed over the
cassette.
16. Tighten the rear axle to 14Nm
using a torque wrench.
17. Press the Cage Lock
button to release the lower cage of the rear mech.
Your new shock is fitted. Now it’s time to get it set up, so head on over to our guide on how to adjust the suspension on your 4060.