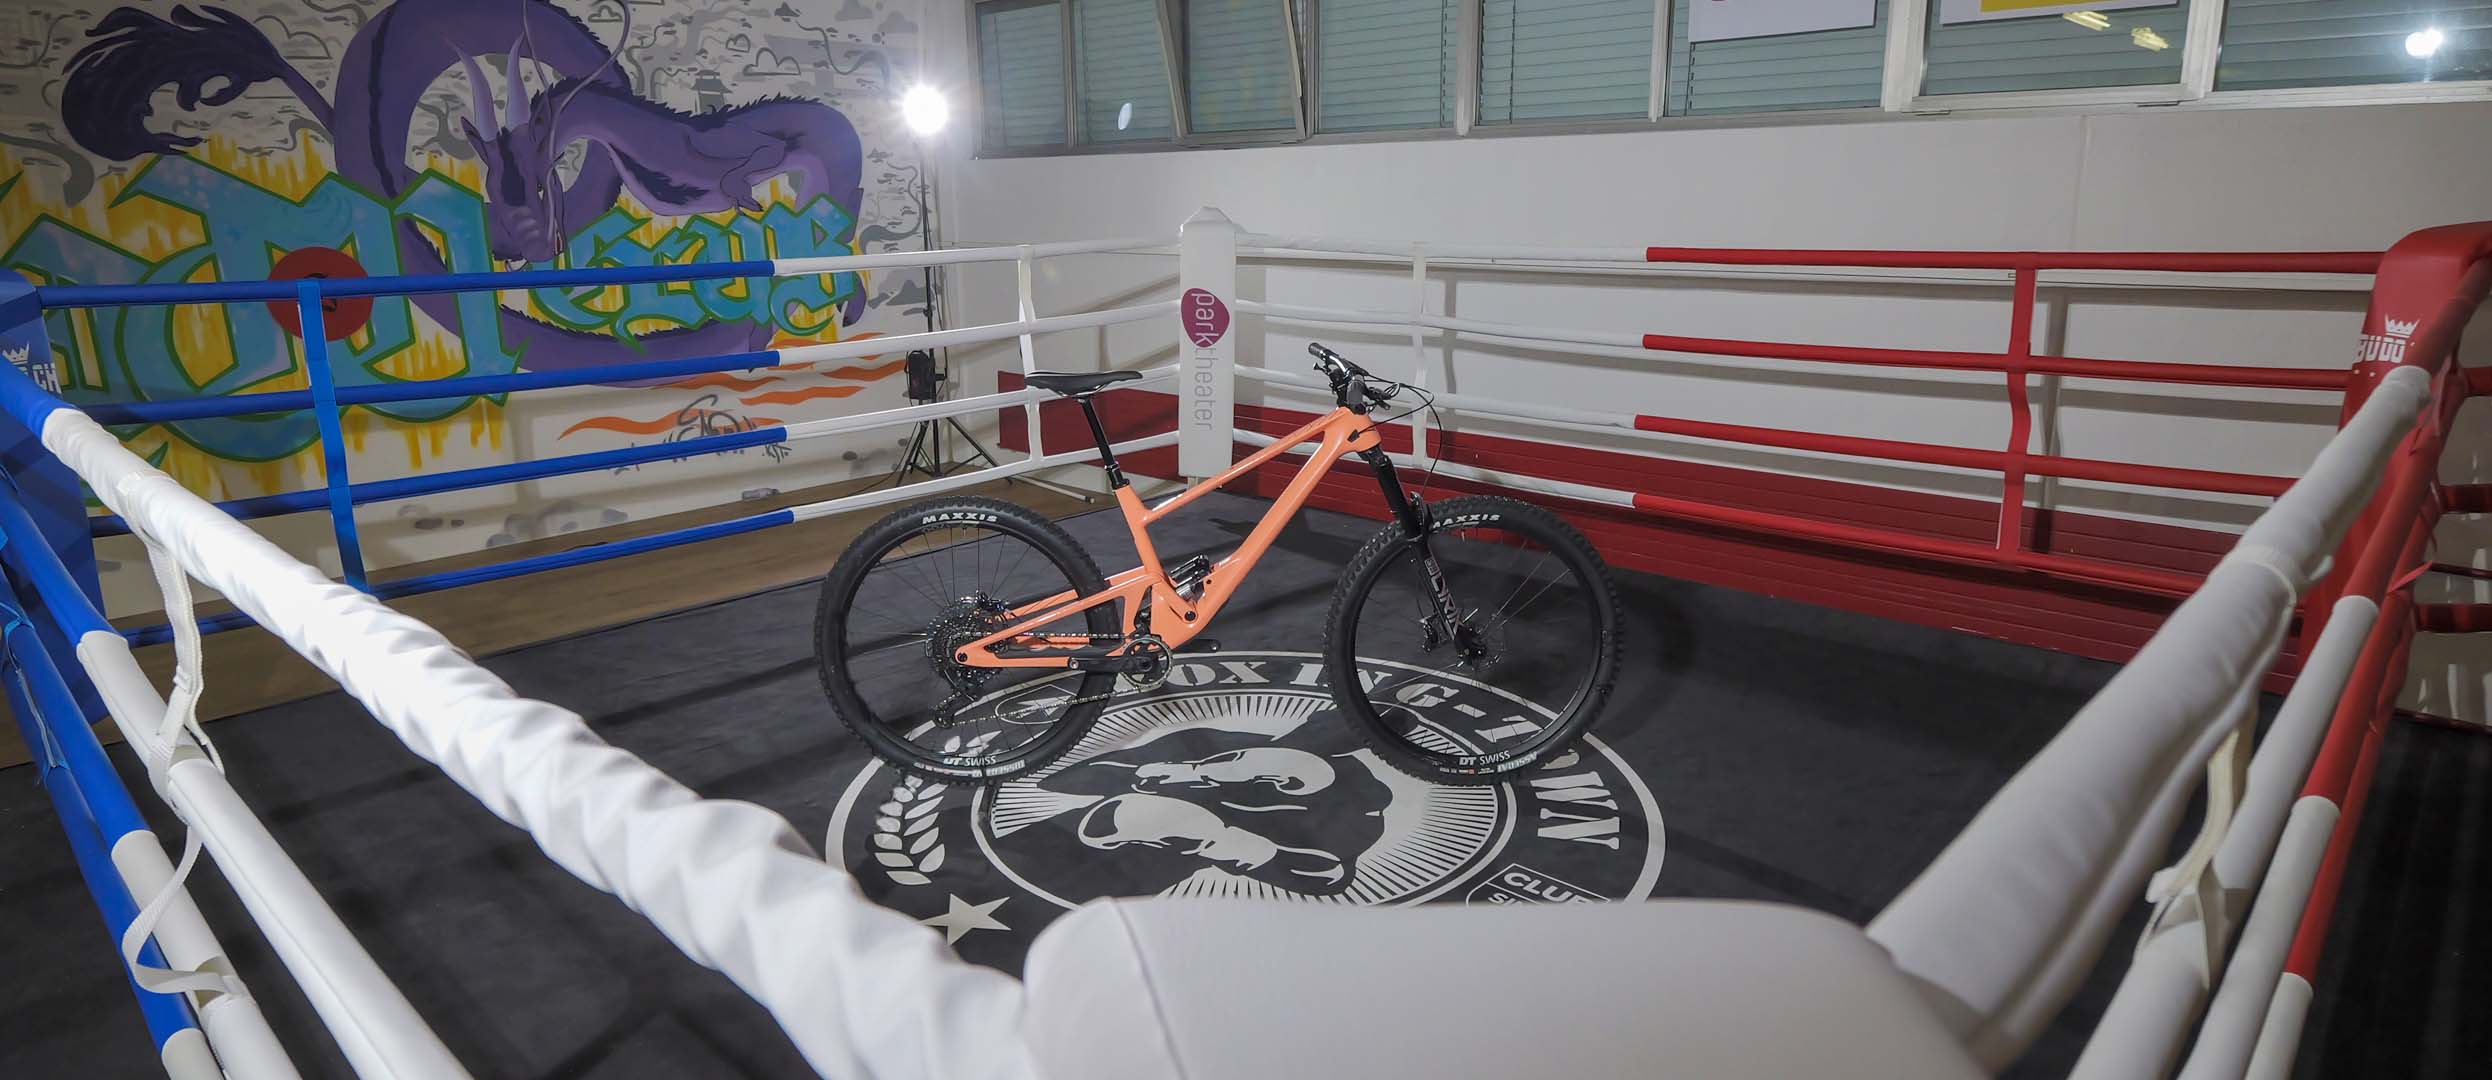
CONTACT POINT SETUP
Out of the box, bikes are set up for the average rider. But we know you’re not average! It really pays to take some time to make a few small changes and make sure your bike feels just right.
There is no right or wrong when it comes to setting up your control points. There’s just what feels comfortable and what gives you the most control over your bike. Most of these setup tips are simple enough to do on the day on the trail. Our advice? Experiment and see what works best for you.
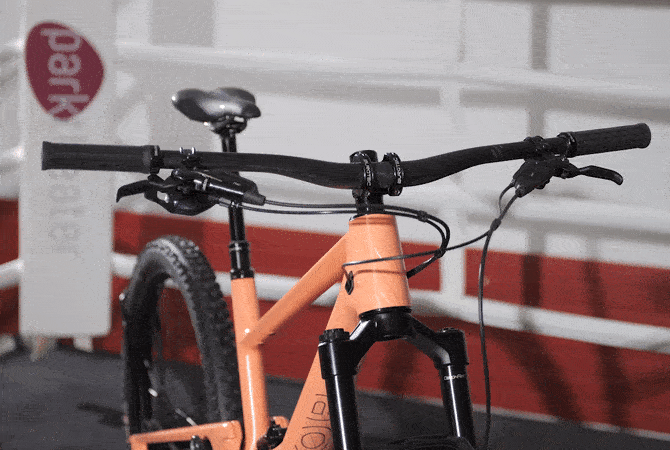
BAR HEIGHT
We’re used to adjusting our saddle height. But the height of our bars? Probably not so much. Correct bar height is hugely important for comfort and control, so let’s get that one sorted.
What’s the correct bar height then?
Where you position your bars comes down to how tall you are, how long your arms and torso are, your flexibility and riding style. The first thing you want to do is make sure your bars are at a height that doesn’t cause any pain in your back or neck. If you feel hunched over, raising your bars will help straighten your back and take the strain out of your shoulders. Remember, good fit always comes first.
I feel pretty comfy, do I need to change my bar height?
You might not need to, but bar height can also be used to fine tune control of the bike. The height of your bars plays a big part in how balanced you are between the wheels. A low bar height shifts more of your weight onto the front wheel, while a higher bar height moves weight to the back. A well-balanced feeling between the wheels is what you should be looking for.
So, how do I raise or lower my bars?
Bar height is adjusted using the headset spacers underneath the stem. Adding spacers underneath the stem means the bars are raised, fewer spacers underneath the stem means lower bars. You may need additional headset spacers but often just re-arranging the spacers that came with your bike are enough to achieve your perfect bar height.
To adjust your bar height, you need:
- A hex key set. That’s it. Simple.
- Stand next to the bike.
- Remove the stem cap bolt and stem cap.
- Loosen the two steerer clamp bolts on the stem.
- Remove any headset spacers on top of the stem.
- Slide the stem off the steerer tube.
- Add or remove headset spacers to raise or lower the bar height.
- Slide the stem back onto the steerer tube.
- Slide any remaining headset spacers back onto the steerer tube.
Make sure that the top headset spacer sits at least 5mm above the top of the steerer tube.
- Reinstall the stem cap and tighten the stem cap bolt so that it removes any play from the steering but does not cause binding.
- Align the stem with the front wheel.
- Tighten the stem’s steerer clamp bolts to the recommended torque settings.
Experiment and see what works for you on your trails. If after playing around with headset spacers you’re still struggling to get the bars high or low enough, you may need to change the bars for those with a higher or lower rise.
What’s the correct bar height then?
Where you position your bars comes down to how tall you are, how long your arms and torso are, your flexibility and riding style. The first thing you want to do is make sure your bars are at a height that doesn’t cause any pain in your back or neck. If you feel hunched over, raising your bars will help straighten your back and take the strain out of your shoulders. Remember, good fit always comes first.
BAR WIDTH
Oh hi! Welcome to the SCOR fitness hour, now let’s do a press-up. Now try doing one with your hands further apart. Now with your hands much closer together. Feel the difference? The same thing applies whether your hands are on the floor or on a handlebar. Matching the width of your bars to your strongest arm position means you’ll get less tired on the downhills and have more control through singletrack. Get it?
You are saying bar width is down to shoulder width, right?
Your trails also dictate bar width. Ride a lot of narrow, tree-lined singletrack? Narrower bars might be a better fit – literally.
So how do I work out my ideal bar width?
You’ve just done it. Do a press up with your palms flat to the floor, get a friend or gym instructor to measure the distance from the one little finger to the one on the other hand. This is a good starting point for your bar width.
Right, looks like I need to make my bars narrower, what do I do?
Before getting busy with a saw, we always say it’s worth making small incremental changes to the bar width, for the simple reason that it’s easier to make bars narrower later on, than to make them wider again.
To cut down your bars you need a bit more:
- Hex key set
- Torx key set
- Saw with fine tooth tungsten carbide blade for alloy bars or a carbon specific blade for carbon fiber bars
- Masking tape
- Saw guide
- File or fine-grit sandpaper
- Place the bike securely in a workstand ensuring you have space to work around the bike.
- Remove the grips, gear shifter, dropper remote and brake levers from the bar.
- Remove the stem faceplate and then the bars from the stem.
- Measure the width of the bars.
- Subtract the measurement you took during your press up from the width of the bars. Divide that number by half - this is how much you are removing from either end of the handlebar.
Again, if in doubt be careful and go for small incremental cuts to bar width.
- Wrap masking tape around both ends of the bar to mark where you will be cutting. On a carbon bar this will also help prevent fraying.
- Double check your measurement. Measure the distance from the outer edges of the masking tape. Remember – better measure twice and cut once.
- Clamp the saw guide in a vice or in a bike stand.
- Insert the bars into the saw guide so that they are horizontal with the floor. Align the edge of the masking tape closest to the end of the bars with the saw guide line.
- Securely clamp the bars in the saw guide.
- Double check everything is secure.
- Slowly start sawing the bar.
- When you have removed one end of the bar, take the bar out of the saw guide and repeat the process on the other end.
- Remove the masking tape.
- The edges of the bar now need to be deburred. For a carbon bar use a very fine grit sandpaper to get a smooth finish. For an alloy bar use a file to achieve a smooth chamfer.
- Clean any metal or carbon dust from the bars.
- Reinstall the bars in the stem and tighten the stem faceplate so that it holds the bars in place.
- Reinstall the brake levers, dropper remote, gear shifter and grips.
- Adjust the position of the bar to make sure it’s aligned centrally in the stem and rolled into the desired position.
- Adjust the position of the brake levers, gear shifter and dropper remote.
- Tighten all bolts up to the recommended torque settings.
Your new bar width might feel a bit strange at first but give it a few rides before deciding whether to make any more changes. Cutting down your bars may mean your cables and hoses might need a slight adjustment to keep them neat and tidy.
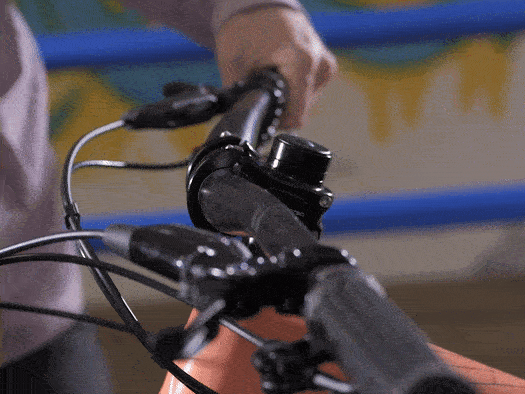
BAR ROLL
The angle of your bars in the stem, is called bar roll and is an often-overlooked adjustment. But trust us, it can make a surprising difference to the control you get through the bars. Ideally you want equal pressure across the palm of your hands when you are in a descending ‘attack’ position on your bike. Rolling the bars helps to find that sweet spot. And you know us. We are all about that sweet spot.
Why should I care?
When the bars are rolled too far forward, it creates more pressure to the outside of your hands. This comprises your grip towards your thumb. Your elbows will also be raised, and your shoulders rolled too far forward. When the bars are rolled too far back, you’ll end up with more pressure to the inside of your hands, which and compromises your grip towards the outside of your hand. Your elbows drop, and this puts your arms in a weaker position. Does that sound like fun? We don’t think so.
So how do I find the correct angle for my bars?
Trial and error. Like everything. Everyone is different and your body proportions and flexibility will play a part in what feels right. Adjusting bar roll is super easy though and can be done right there on the trail, so it’s worth playing with.
To adjust bar roll you need two things:
- Hex key set
- Torx key set
- Slightly loosen the bolts on the stem faceplate to be able to rotate the bars with a bit of force.
- Mount the bike and steady yourself against a wall, a tree, or a buddy.
- Stand up on the pedals as if descending.
- Roll the bars slightly away from you so they rotate forward in the stem. Then do the opposite, rolling the bars backwards. Note the difference in feel.
- Rotate the bars so that you have an equal amount of pressure from the bars across your palm.
- When you find this point tighten the stem faceplate bolts back up to the recommended torque settings.
- You may have to adjust the angle of your brake levers, gear shifter and dropper remote to compensate for the new bar angle.
Even rotating your bars by just a degree can have a big difference to the riding feel. Make tiny adjustments until you feel comfortable. Like in life. You’re welcome.
BRAKE LEVERS AND SHIFTERS
The positioning of brake levers and gear shifter play a huge part in the safety and efficiency of how you stop and go. It goes without saying that this is worth spending the time setting them up just right. Let’s go.
How do I adjust my brake levers?
There are three key factors in setting up brake levers – position, angle, and reach. Brake levers should be set up to work best when you are standing up on the pedals and in a descending ‘attack’ position, as this is when you’ll be using them most.
The brake lever position is adjusted by moving the complete lever assembly on the bars. For this you need:
- Hex key set
- Torx key set
- To find the best position for you, mount the bike and stand on the pedals in the descending ‘attack’ position with your hands resting on the grips.
- Extend your preferred braking finger, typically your index finger. This should comfortably meet the flat blade of the lever.
- If it doesn’t, loosen the bolt securing the lever assembly to the bars and slide it to the correct position.
- Do this for both levers but don’t tighten the brake lever assembly bolt quite yet.
Next up, let’s adjust that lever angle.
- Stand on the bike in the same descending ‘attack’ position as before.
- Rotate the brake lever so that with your preferred braking finger on the brake lever, your wrist roughly aligns with your forearm.
- Tighten up the bolt on the brake lever assembly.
Finally, we’ll adjust the lever reach. This is adjusted using a dial or screw, check your brake manufacturer’s manual for details.
- Turn the reach-adjust dial or screw to move the brake lever closer or further away from the bars.
- Aim to position the brake lever so that your finger is not stretched out too far and can comfortably hook onto the flat blade of the lever.
These are just starting points. Dialling in the perfect brake lever setup comes down to all kinds of factors. From how steep your trails are, to your position on the bike and the feel of your breaks. Experiment and find what works best for you. Don’t worry. You’ll get there.
Wait. What about my gear shifter and dropper remote?
Take it easy. Once you’ve got your brakes where they need to be, you can move on to the position of your gear shifter and dropper remote.
As with your brake levers, you want them to be easy and comfortable to use. Again, this comes down to things like personal preference, body position, the size of your hands and the kind of riding you wanna do. And just like the positioning of the brake lever, the dropper remote should be adjusted to best support you when you are out of the saddle and descending. The position of the gear shifter is a compromise between both out of the saddle and descending body positions.
To adjust your gear shifter and dropper remote you need:
- Hex key set
- Torx key set
- To find the best dropper remote position for you, mount the bike and stand up on the pedals in the descending ‘attack’ position with your hands resting on the grips.
- Note where your left thumb is in relation to the dropper remote lever.
- Loosen the bolt that attaches the dropper remote to the bars and move it so that the lever is placed naturally under your thumb and allows a full range of movement during activation.
- Tighten the bolt of the dropper remote.
- Repeat the same process with the gear shifter but make sure it is within easy and comfortable reach in both the seated and standing position.